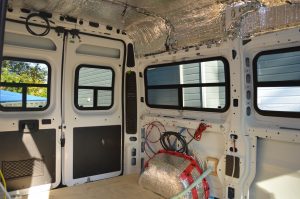
 Are your RV windows still foggy no matter how much you clean them? Can you already see cracks in them? Are there problems with the locks and levers?
If your answer is ‘yes’ to either one of these, you might need to replace your RV windows. But how much will all these repairs and replacements really cost you? Let’s dig up on that.
Related: 5 Tips For Successful RV Window Repair
What covers the costs
Quality RV windows can stand the test of time. To know how long it’s going to take your current windows before they shatter into pieces, contacting a seasoned RV window professional is recommended.
Repairs, on the other hand, can only do so much and it’s an entirely different story if the windows and parts are too old to function. Most of the time, older RV models won’t have available parts in the market. That’s why it should be replaced once and for all.
There is no fixed price for RV window replacements as every window can vary. Many factors are also measured to determine the costs, like the window dimensions, shapes, and frame styles and tint colors.
To know how much it’s going to cost your RV window replacement more accurately, consider requesting a quote from quality manufacturers.
 Save and go DIY
There’s always the option to DIY and save from the professional fees it can cost you. For first-time DIYers, we have a guide to help you out.
The first is to purchase the needed materials. Though there are a lot of manufacturers in the market, consider choosing one that has a proven track record. Your new RV windows must be ergonomic and durable to be able to stand rough times.
To begin, complete the parts such as the window and frame, interior trim ring and something to seal and secure the screws, and flange seal tape. You will also be needing a screw gun and a putty knife during the installation process.
Here are the steps to nailing your first DIY RV window replacement:
1. Remove the old windows
Unscrew them using your screw gun from inside the vehicle. Most windows have 12 to 20 or more screws attached to it.
Very carefully remove the window from the hole. It’s advisable that there are people on both sides (inside and outside) to do this properly.
There might be chances that windows are irremovable despite removing the screws. Grab your putty knife and scrape the seal off. Upon window removable, scrape off the remaining tapes and sealants so you can start with a clean frame.
2. Make sure it’s a perfect fit
Before even making your purchase, see to it that you have measured the window frames well. Manufacturers can only help you as much as identifying the sizes from their products.
Test if the windows and frames are a perfect fit. The window flange exterior must overlap by at least 3/8 cm so it can be properly sealed.
The interior, however, must have at least ⅛ cm to ¼ cm to be covered by the trim ring properly upon installation.
3. Prepare the new windows for installation
Apply the bulb seal tape around the flange, and do this very carefully. You may want to place it on a cloth or carpet so it won’t be scratched. Start from the center all the way around until both ends meet, but be sure there won’t be any gap in between.
4. Install the new windows
From outside the vehicle, place the window into the clear opening. One should be helping on the inside so that the interior trim ring can be put properly in place. Fasten the four corners first to secure it, then work your way around the perimeter, screwing it firmly.
So there you have it– you can now hit the road with your newly-replaced RV window! If you need a more comprehensive guide, watch these videos to guide you step-by-step.
If you are looking at replacing your old and worn-out RV windows, it’s best to come prepared for the costs. Hiring a professional will save you a lot of hassle and time installing your new windows.
For expert advice and quality RV window parts and materials, you know the people to call. Contact our team of professionals at Motion Windows.